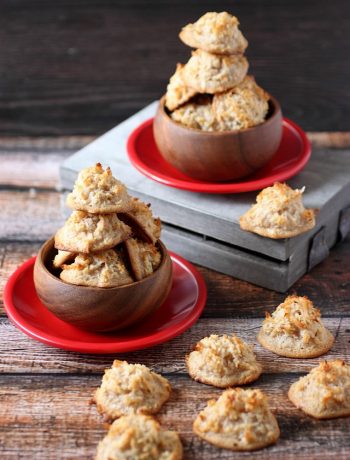
Homemade Samoa Cookies. For those times when you’re jonesing for a Girl Scout Cookie and there is no Girl Scout to be found!

Girl Scouts don’t come knocking at my door peddling their cookies. You see, I live in “The Hood”. It just doesn’t happen ’round these parts. I don’t have little girls in pig tails and sashes pulling little red wagons piled high with their wares.
Saavy little girls pulling a sales pitch; convincing me that buying 10 boxes of cookies is a good thing for my ever expanding hips.
But oh, how I want that!!
No, not expanding hips…
No chick wants expanding hips unless she’s Plastic Man. I mean Girl Scouts selling me cookies.

I want them to knock on my door persuading me to buy. It won’t take much, trust me… I want them to tell me it’s for a good cause – The Girl Scouts of America!
I want to display a skewed sense of altruism, feel I’m selflessly helping these cute little girls in merit badges. It’s a donation, really. I want to tell myself I’m donating money for several boxes of yummy waist expanding cookies. It’s the American thing to do.
I’m all for the cause…
*Sigh*…

Those little girls won’t be knockin’ on my door anytime in the foreseeable future.
Sigh…
So one day as I was scouting the blogs I stumbled upon In Katrina’s Kitchen – And found my favorite Girl Scout cookie – The Caramel De-lite; otherwise known as the Samoa.
WhoA!
Is it just me or does Caramel De-lite sound like something naughty you do in the afternoons?
Hmm…
I think naming the cookie after a calorie-ridden Sumo wrestler is much better – And let me not kid you, this bad boy is chock-full of calories.
CHOCK.FULL.
I promptly toss the box in the recycling when I buy them. I don’t wanna know…
Because…
Because…
What’s not to love about these… These… pretty lil’ things? These irresistible bites of pure addictive bliss?
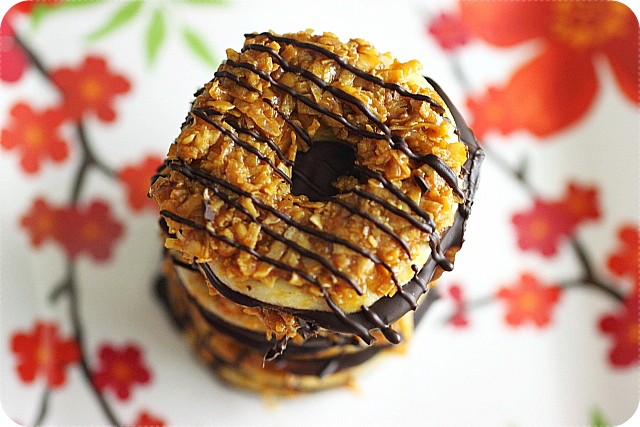
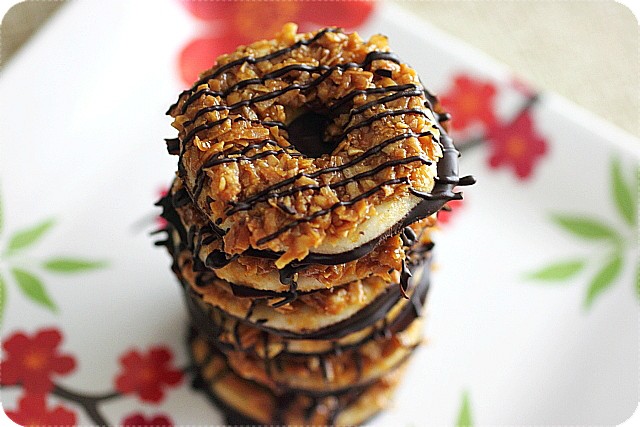
A shortbread cookie with a coconut caramel topping whose cookie bottoms are dipped in chocolate, and then drizzled with even more chocolate!?
Whoa, mama…
Try em once and you’re hooked, like a heroin addict. You’ll be vein tapping as they bake, and your eyes will glaze over as your offset spatula spreads coconut caramel topping.
It’s hypnotic, really.
During the final phase, the one where you glaze your cookie with melted chocolate, you’ll be tempted to sell your prized possession.
Chill, though… Your fix is coming.
Coming indeed…

[purerecipe]
Homemade Samoa Cookies
Ingredients
For the cookies
- 1 cup 2 sticks butter, softened
- 1/2 cup sugar
- 2 cups all-purpose flour scooped then leveled
- 1/4 teaspoon. baking powder
- 1/2 teaspoon. salt
- 1 1/2 teaspoon. vanilla extract
- Scant 2 tablespoons milk
For the topping
- 3 cups sweetened shredded coconut
- I used Nestle's La Lechera dulce de leche 1 14oz can of of dulce de leche
- 1/4 tsp. salt
- 3 tbsp. milk
- 8 oz. semisweet or bittersweet chocolate
Instructions
- Bake the cookies - Preheat oven to 350F. Line 2 cookie sheets with a layer of parchment or a silpat.
- In a medium bowl add the flour, salt and baking powder. Mix to incorporate and set aside. In a bowl of an electric mixer, with the paddle attachment, cream together butter and sugar until light and fluffy at medium speed, about 3-4 minutes. A hand mixer works well here, too.
- Mix in the vanilla extract. Turn the mixer speed to low, and add the flour, baking powder and salt, followed by the milk, one tablespoon at a time until the dough comes together without being sticky. The dough should come together into a soft ball.
- Turn the dough onto a very lightly floured work surface. Divide the dough into two pieces and form each one into a rectangle. Wrap the pieces of dough in parchment paper or plastic wrap and freeze for about 45 minutes to an hour. Have a glass of wine or a mock tail…Take one piece of dough from the freezer and set aside. We are going to roll the dough in between two pieces of parchment paper.
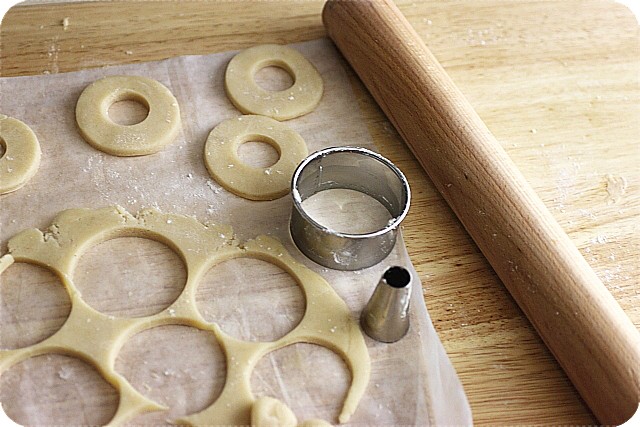
- Lay the first piece of parchment paper on your work surface. Lightly flour the parchment. Place your dough square on top. Very lightly flour the top of your cookie dough and place another piece of parchment on top. Roll the dough to about 1/4-inch thickness. Use a 1 1/2-inch cookie cutter and cut the dough into rounds. Cut a center hole (I used the bottom of a large star tip), and then transfer to your prepared cookie sheet.
- Gather the scraps of dough together, form a rough rectangle and repeat the rolling process. If dough gets too sticky to work with, just put it back in the freezer for a few minutes and proceed with rolling. Repeat with the second rectangle of dough.
- Bake cookies for 10-12 minutes, until bottoms are very lightly browned and cookies are set. Cool for a few minutes on the baking sheet then transfer to a wire rack to cool completely.
- While the cookies are cooling make the topping.
- Toast the coconut - Lower the oven heat to 325 degrees Fahrenheit. Place the coconut on a cookie sheet, and toast the coconut until golden, about 10-12 minutes. At the 5 minute mark, open the oven door and stir the coconut flakes to ensure even toasting. Be sure not to forget you’ve got coconut flakes toasting in the oven. You can easily burn those bad boys and have to start over again.
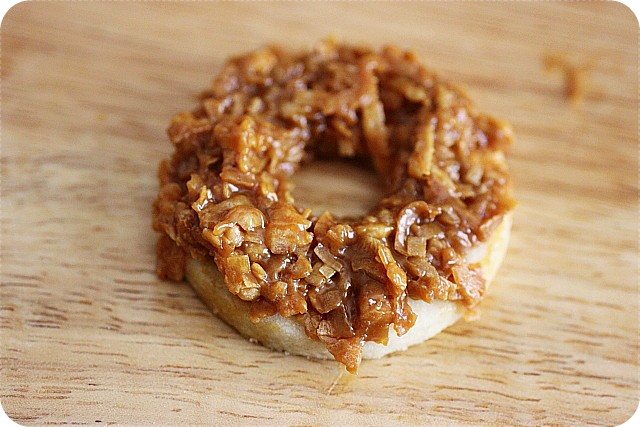
- Make the topping - Open the can of dulce de leche and place in a large microwave-safe bowl with the milk and salt. Cook on high for 3-4 minutes, stopping to stir a couple of times to help smooth the caramel and incorporate the milk. Once smooth, add toasted coconut and stir with a spatula until incorporated.
- With a small offset spatula or spoon, spread about 2-3 teaspoons of topping onto each cooled cookie. If the caramel gets too tough to work with, just put it back in the microwave for a few seconds.
- While topping sets, melt chocolate in the microwave stopping to stir at 45 second intervals to prevent the chocolate from scorching.
- Assemble the rest of that bad boy - Dip the bottoms of each cookie into the chocolate and place on a clean piece of parchment paper.Transfer the remaining chocolate into a piping bag with a number 1 Ateco tip or a cornet with the tip snipped off and drizzle finished cookies with chocolate.
- Place the cookies in the refrigerator for a few minutes for the chocolate to set. Store these cookies in between squares of parchment and place in an airtight container. Cookies should maintain fresh for about 3 days. That’s if they last that long.
- Adapted From: In Katrina's Kitchen